Archive for the 'Cool Stuff' Category

Page 4 of 8

How to Passively Monitor Linux Machines with NRDS & Nagios XI

When active agent-based monitoring is not an option (because of a firewall, or security restriction), passive monitoring can provide the solution necessary to maintain network security and health. Today we will be discussing Nagios Remote Data Sender (NRDS) and how it can monitor Linux machines using passive check results. Passive results are sent to the Nagios Remote Data Processor (NRDP) server and processed in Nagios XI.

The NRDS client configuration can be managed centrally via the NRDS Config Manager Component in Nagios XI. Updated configuration files on the NRDS server are automatically picked up by all clients. The NRDS client runs on a cron job at a specified interval. Each time it runs, it will do the following:

  • Run all of the commands, specified in the config file
  • Send the results back to the Nagios XI server
  • Check if there is a new version of the configuration file on the Nagios XI server, and if there is one, it will download it
  • Download all of the plugins it needs from the server and install them on the client

In this article, I will show you how you can start monitoring a Linux host passively in three easy steps.

Step 1  – Adding Configuration

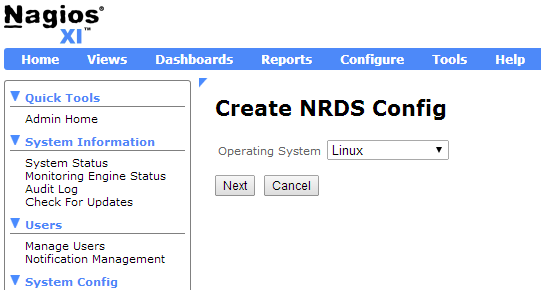
Go to Admin -> Monitoring Config -> NRDS Config Manager, click on Create Config, and select Linux from the Operating System drop-down menu.

Create NRDS Config

Continue reading ‘How to Passively Monitor Linux Machines with NRDS & Nagios XI’

Using the Mass Acknowledge Component in Nagios XI

The Mass Acknowledge component in Nagios XI 2014 makes it very easy to mass acknowledge problems with hosts/services that are in non-OK state. The component allows you to suppress additional alerts to be sent out, while a team member works on resolving the issue(s). This component can also be used to schedule downtime for hosts/services, or schedule immediate checks in bulk.

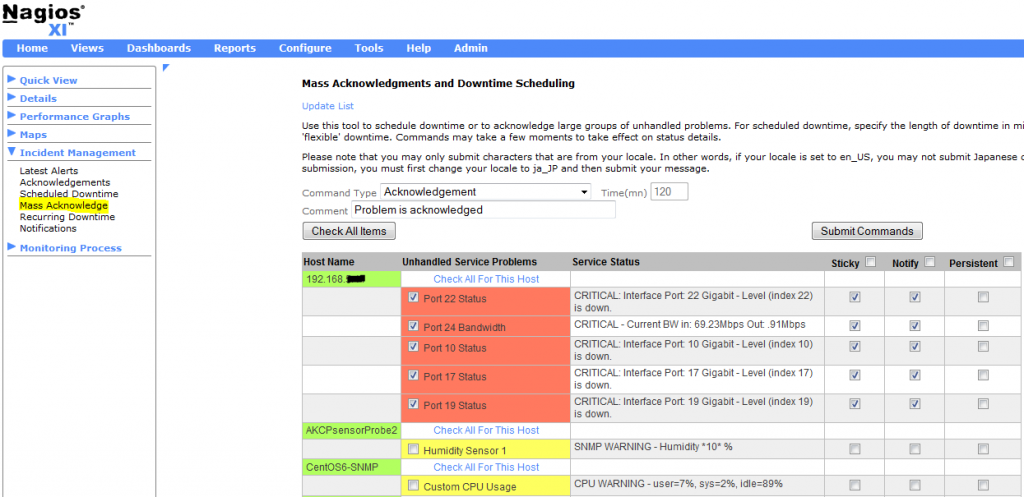
From the Nagios XI Home page, navigate to Incident Management –> Mass Acknowledge. Select the function you would like to use from the Command Type drop-down menu. Then, select the hosts/services you wish to target. You can select some of the hosts/services by clicking on each checkbox or you can select all of them at once, by clicking on the Check All Items button. If you suspect that there are more hosts/services in a non-OK state than those you see on the page, you can always click on the Update List button on the top to update the list.

Next, set the length of downtime in minutes, and enter a comment. You have an option to choose whether to send or not to send alerts. Simply select or deselect the appropriate Notify checkboxes. Also, you have an option to make some (or all) of your comments Sticky or Persistent.

Note: If you want acknowledgement to disable notifications until the host/service recovers, check the Sticky acknowledgement checkbox. On the other hand, if you would like the host/service comment to remain once the acknowledgement is removed, check the Persistent acknowledgement checkbox.

Finally, click on the Submit Commands button.

Mass Acknowledgements and Downtime Scheduling in Nagios XI

Continue reading ‘Using the Mass Acknowledge Component in Nagios XI’

Monitoring Gas Prices Using Capacity Planning in Nagios XI

Nagios XI is the most powerful IT infrastructure monitoring solution on the market.  You can use it to monitor virtually anything.  Although Nagios XI is typically meant for more “serious” work, you can have some fun with it as well!  I guess I have been somewhat nostalgic lately…  Do you remember when a gallon of gas used to cost less than a dollar? 🙂

In this article I will show you how to install the check_gas_price.py plugin, set up a dummy host, and add multiple services to it.  This will allow you to check the gas prices in the USA.  Then you may use the Capacity Planning component in Nagios XI Enterprise Edition to view the trends of gas prices in the USA.

First, download the check_gas_price.py plugin from this URL:

http://assets.nagios.com/downloads/nagiosxi/scripts/check_gas_price.py

Next, install the plugin from the Nagios XI web interface by going to: Admin –-> Manage Plugins –-> Choose File, then select the check_gas_price.py file and click Upload Plugin.

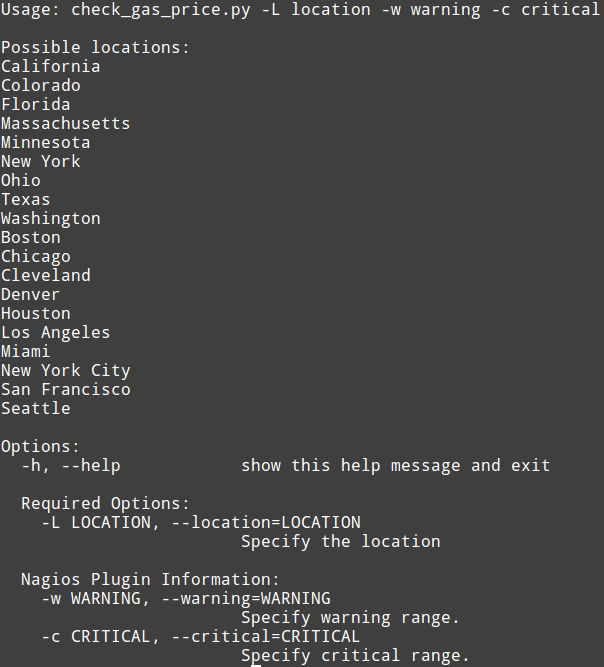
If you would like, you can view the plugins’ usage by typing in terminal:

Your output should look like this:

Monitoring gas prices with Nagios XI - check_gas_price.py

Continue reading ‘Monitoring Gas Prices Using Capacity Planning in Nagios XI’

Keeping an Eye on Problematic Services with the Status Info Dashlet

The Status Info Dashlet has been available on the Nagios Exchange website for about a year now. It is a very cool dashlet, that in my opinion, doesn’t get the attention it deserves. The Status Info Dashlet allows you to display the current status of a service as a dashlet on a dashboard in nice big numbers, and is especially useful in cases when you want to keep an eye on a problematic service.

Setup and Installation of the Status Info Dashlet is quite easy:

First, you need to download the dashlet from the Nagios Exchange site: Status Info Dashlet
Direct Download Link: statusinfo.zip

Next, add the dashlet from the Nagios XI web interface:
Admin -> System Extensions -> Manage Dashlets -> Browse -> statusinfo.zip -> Open -> Upload Dashlet

Once the dashlet has been successfully installed, you can add it to a dashboard of choice:
Dashboards -> Add Dashlets -> Available Dashlets
and clicking on the “dashify” icon in the upper left corner of the dashlet to add it to a Dashboard .

You will see the “Add To Dashboard” interface, which has many different options, allowing you to customize your dashlet. The first three options on the top allow you to set the dashlet’s title, the dashboard, where you would like the dashlet to be added to, and the refresh rate. Below these three options, you will see eight tabs for even more customizations. I will go through each one briefly, and describe the most basic choices.
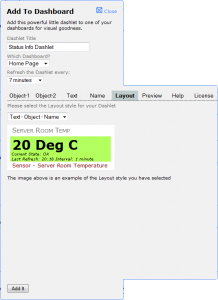
1) Object-1

Here you can select the object (service), that you want your dashlet to use. You also have an option to show the current service status as text, set the background color, “trim” the output (the beginning or the end), in order to discard the information that you don’t need. You can also show the last refresh time and the refresh interval underneath the object.

2) Object-2

This is NOT a place, where you can select a second object (service) – the name is a bit misleading. Here you can change the object text formatting (text size, weight, style, color, etc.)

3) Text

From here, you can add additional text to your dashlet and style it how you want.

4) Name

The menu allows you to select the name format that you want to appear in the dashlet. The available options are:

– Host
– Host – Service Name
– Service Name
– Service Name – Host

You can also format the text (size, style, color, etc.)

5) Layout

This allows you to select how you want the dashlet displayed. There is a drop-down menu with a various combinations for displaying “Text”, “Object”, and “Name”.

6) Preview

When you click on this tab, you will see a preview of what your dashlet will look like.

7) Help

The help menu explains in details the various options that exist in each section/tab.

8) License

Here you can read the license for this dashlet.

After you selected all of the options you want, just click on the “Add it” button on the bottom. Then you can go to the dashboard, where you added that dashlet and view status info for your service.  You’ve now successfully added the Status Info Dashlet to your Nagios XI views.  It’s as easy as that.